Last year, around October, I think, my guy decided he wanted to be Buddy Christ for Halloween this year. He stopped shaving and let his hair grow out all year in preparation.
Knowing he might be less inclined to dress up this year if I wasn't participating, I set out for ideas for my own costume. I really didn't know what I wanted to be at all. The last time I dressed up in a costume for Halloween.... and we're not counting "reusing costumes just for the heck of it"... was in 2006 or 2007 when I was a Hogwarts student. I've since reused that costume a couple times.
ANYHOO, starting this past September I started wandering costume sights, aimlessly clicking links I might be interested in, and seeing if I could successfully find a costume I'd want. No luck. It wasn't until the end of September that I'd find something that caught my eye.
At the end of September, for those who didn't read my 3DS post, I got back in to Pokemon. And while looking up Pokemon DS games, I came across this costume available online:

And it clicked. I could be Pikachu!! I immediately loved this costume, but not completely, only aspects of it. So I wandered online to look for better costumes. I couldn't find one I liked more than this costume. I liked the tutu and the idea of just having a shirt, tutu, and some arm and leg warmers to "become" Pikachu. But I didn't like the random lightning bolts on the shirt, or the buttons on the warmers, or the fact that the hat has Pikachu's whole face on it. If I'm going to be Pikachu, shouldn't I be the face? And then there's the tail... nowadays, a female Pikachu has a notch in the tail... and this one didn't. (Hey, if I'm going to be a Pikachu, I might as well be the right gender! Even if no one else notices that but me. lol.)
So I decided to make my own Pikachu costume, using that image as inspiration. I wanted a tutu, and leg warmers and a tshirt, but that's where similarities change. The shirt I wanted would be more "80's" style, in that it hung off a shoulder and was looser than the image above. (I'm a bigger gal, not a fan of tighter fitting clothes.) My plans included fingerless gloves instead of arm warmers, giving me the option to wear bracelets if I wanted to, and better fitting alongside my 80's style shirt.
I started the costume that very week.

~a couple of plain yellow shirts,
~some tulle, (in two different yellow colors because they didn't have a yellow that matched the shirt)
~elastic for the tutu,
~embroidery thread, (in case I wanted to make a friendship bracelet in those colors. I ended up choosing not to, the one I attempted to make looked awful, but I did use the yellow for sewing thread, so not a complete waste)
~a plain black shirt, and
~some brown leggings.
I did the shirt first. I picked a size bigger than I'd normally get, cut a few inches off the bottom, the hem off the sleeves, and then a bigger neck hole so it could hang off a shoulder.

Then there's the back, a Pikachu has two brown stripes across its back. So I trimmed the brown leggings so they'd be more like shorts, (to wear under the tutu) then used some of the brown left over from that. I cut two straight lines across the back of the shirt, then pulled at the cuts to make the fabric roll.
.jpg)
Then I glued the brown inside. Tshirt done! Haha. And shorts done for that matter. lol.
My next piece of the project was a Pokebra. I had seen them while looking for pikachu costumes and new I wanted one, even if it doesn't get seen in my costume. When else am I going to have an excuse to wear a Pokebra?

The tutu was the most difficult part for me. Never having made a tutu, I went online for tutorials and settled on one I thought would work to look as close to the inspiration costume's tutu, and bought tulle for it accordingly. But the measurements didn't work and I didn't realize it until the very end. Sooo...

I decided right off the bat that the tail and ears should be stuffed, and that the ears should be on a headband and not a hat. So I drew out a template on some cardboard, the cut accordingly and sewed appropriately.
The ears were done in all yellow, then the black tips were glued on with fabric glue. I used the shirt collar I cut off my shirt to slide on to a headband that had fallen apart, then glued/sewed it all in to place. My ears are at a permanent angle because I didn't want both ears to flop and look sad.
.jpg)
The tail was a bitch. I think I finished it the night before Halloween. Half of the tail was sewn by machine, and the other half by hand, because the darned sewing machine decided to stop working for me. (yay.) Then I took a wire hanger, bent it to match the shape and shoved it inside the tail before adding the stuffing. Then I fabric glued some brown on to the end. For the belt, I used the cut off bottom hem and shoved a thin, old belt through it. I roughly sewed through the belt and the fabric to make sure it wouldn't twist. I had just that tail alone next to the for a while before figuring out how to attach it to the belt. My dad helped by suggesting a cross (†) shaped wire in the bottom to help counterbalance it. So I used another wire hanger, shaped it in to a †, and inserted it in to the bottom by cutting a hole a few inches above the end of the tail. (Or rather, the beginning of the tail... whatever.) Stuck the belt through the same hole and glued it all down with some E6000 craft glue. I camouflaged the hole by adding a couple strips of the tulle to it, so it could blend in a bit better to the tutu.
I sewed a smaller stuffed lightning bolt at the same time as the tail and ears because I knew I wanted a pikachu attack. I achieved this attack by making a necklace out of a long chain. I added my own shrinky-dink-ed lightning bolt to the necklace, attached the closure to fit as almost like a choker, and let the rest of the chain dangle. Attached the stuff lightning bolt to the end of the chain.
.jpg)
I originally had no plan for shoes, thought I'd just wear regular sneakers under the leg warmers, but then remembered these heels.

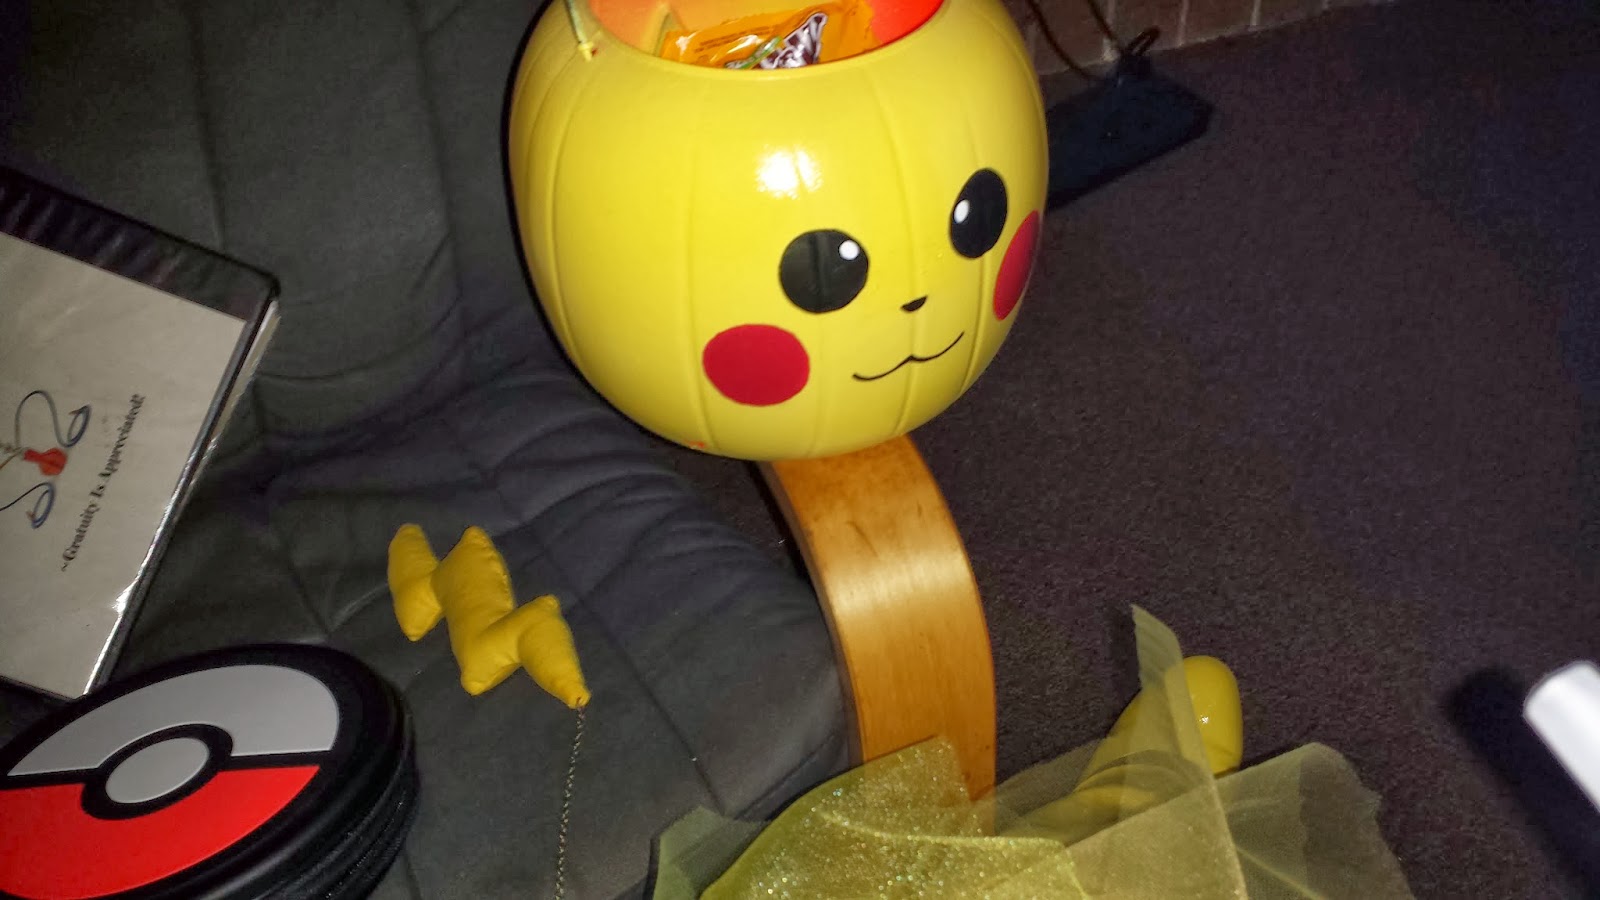
I also purchased a $1 plastic orange jack-o-lantern candy bucket that I spray painted yellow, turned around, and painted a pikachu face on. Inside the bucket is Milk Duds, Butterfingers, and Peanut M&Ms. (All yellow wrapper-ed candies. lol)
I also cut out and sewed some yellow legwarmers from the extra yellow shirt, which were tightened and loosened by using a strip of the shirt pulled tight so it would roll. (So it was a thick string, basically)
The fingerless gloves were made by cutting out hand sized sections of shirt. (from the sleeves of the second shirt) Then I cut a hole where the thumb goes, and folded hems that I glued shut. (not hems along the wrist or fingers, but the ends of the section that came together lengthwise on my hand) Once the glue dried, I cut small holes, and, using more "thick strings" I used for the legwarmers, I laced together the pieces and tied them closed.
Partway through the making of the costume, I decided I wanted pokeball beads. So I went upstairs and rummaged through my old costume jewelry. Found a necklace that had the size beads I was looking for, and stole six of them.

I redid the pokeball nails that I'd done a couple months back, this time adding a pikachu to it.

So the week before Halloween, my guy decided then was the time to look for a Jesus costume to be Buddy Christ. But the only one we could find was $60 and that was more than he was willing to spend. So after deciding not to spend money on fabric at Hobby Lobby, we headed to Meijer, in hopes of getting some sheets we could use to make his costume. Our Meijer doesn't sell individual sheets. So I had to persuade him to go to Walmart, where we grabbed two twin sized, cream flat sheets, and one dark red twin flat sheet. Total cost $15. Woot.
Aaaaand.... then I caught a cold. It was actually kind of starting a few days before that, but I was unable to fight it off, and it left me feeling like crap. Too much so to work on the costumes. As a result, we started his costume the Monday before Halloween.
First we needed that heart pendant thing.

I started by making a heart out of aluminum foil. I flattened the back out, then traced it on to foam core board.


I was planning on taking pictures of this entire process, but just forgot. So now I'll just write it out and hope I don't get too confusing.
From here I took some newspaper, napkins, and a paper mache mix, (I used flour and water with some salt to prevent molding) and started covering the heart with a thin layer of torn newspaper strips. I also covered the back of the foam core board with the torn strips as well, hoping to reinforce it a bit.
While the heart was drying and once the back of the board dried, I began the front design. I started by cutting strips of napkin, rolling them into ropes, covering them in the paper mache, and then placing them on the board.
I drew a quick pic in Paint here....

While that all dried, I took the heart and covered over the thin newspaper mache with a layer of napkin, used to smooth out the roughness and the sharp edges that the newspaper might have caused. That was left to dry.
Then my guy helped me out by drilling two holes in the center of the board (where the heart will go) so that I could attach some wire to it. (there needed to be a way to attach the whole thing to the costume)
I painted the board gold and the heart red, then glued the heart to the board. The board is not level, nor is the back of the heart, so I used glue-soaked tissue in order to attach the heart properly. I had to hold it in place for nearly all of The Nightmare Before Christmas before it was dry enough to stay put.

I also painted some pokeballs out of a couple of plastic clear ornaments.

Sometime in between the making of that pendant, we placed the two cream sheets on the ground, drew and cut out a tunic thinger. Then we pinned the two sheets together and had my guy try it on to make sure it would fit. We glued the edges together with fabric glue and let that dry.
I took the red sheet, folded it in half, and did a quick hand sew to secure the sheet end to end.
We got a couple yards of gold rope from the upholstery department of Hobby Lobby to tie around the waist as a belt, ($3 I think with a coupon) and voila, done.
And now, some finished pics...


Here we are together!

Another pic of me...

My friend, the unicorn, and me.

Another pic of Buddy Christ and Pikachu

The four of us. Pikachu, Buddy Christ, the Unicorn, and Dead Pool

A closeup of me, you can kind of see the earrings here, and you can see how my necklace worked.

Aaaand one more pic of the two of us. I drew the nose on with black face paint, then my guy fixed it so it was a bit more even. Then I cut a circle template, which my guy used to paint my cheeks red with face paint.
So that was my Halloween costume! We hung out with friends at a Hookah lounge, then went out to eat at a Steak and Shake. :)


No comments:
Post a Comment
Comment comment comment comment? Cheep cheep!