 Hallo! Take a look at my icon, ha, it's the first icon I used on the ED Forum. Ah memories.
So here is where I shall spend my time talking too much about my entry. hehe haha. I reeeeally wish I had managed to take more pictures of my present, but I felt so pressed for time most of the time, and once it was finished, I was just so happy I took a couple pics and then sent it away.
When Marina first mentioned this year's contest, I was so happy. The idea of making a present for Marina, and then having that be the contest entry sounded completely awesome. I wasn't too big of a fan of last year's contest, it was too random for my tastes. So immediately I went in to a bit of a panic, wondering what I could make... and then almost just as quick, I thought of making a birthday party. He hee. I had made rooms before:
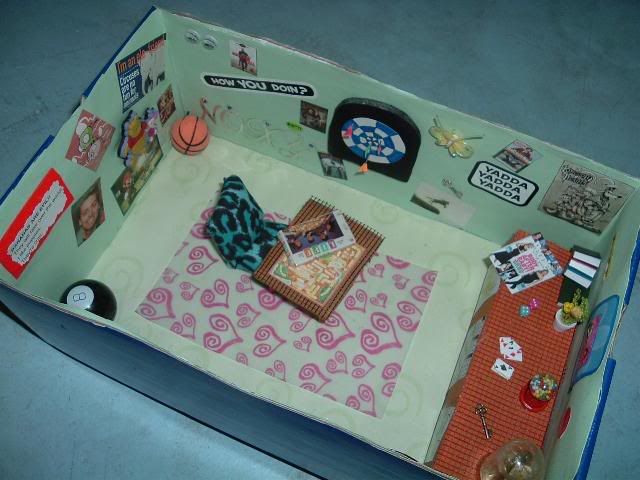
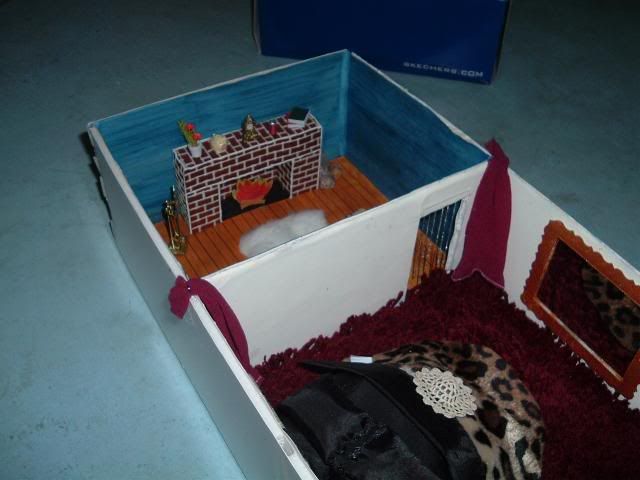
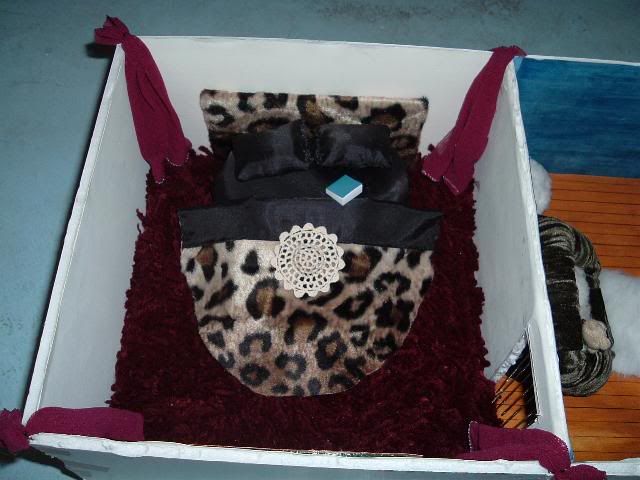
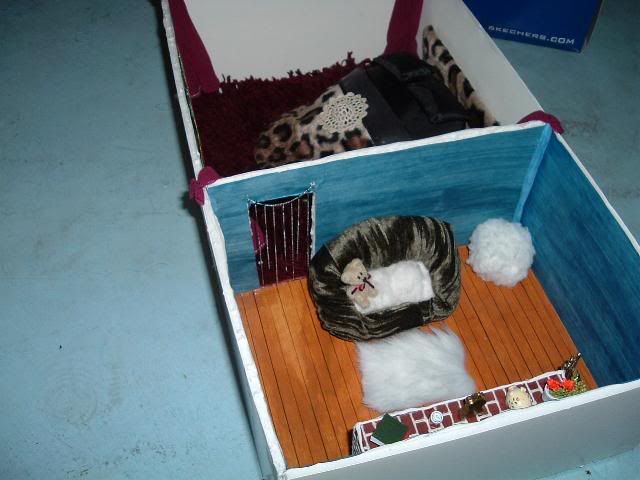
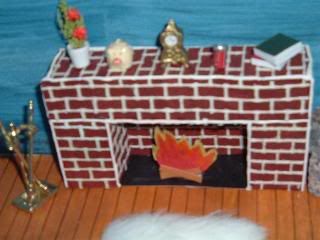
And I'd made dolls before, and knick knacks... so I figured a birthday party would be perfect! Especially since I had had so much fun making those rooms before, and haven't had an excuse to make another room in years and years. These were probably made about five years ago. My friends back then wanted to make a dollhouse type thing, and gave me the playroom, and a bedroom suite to do.... I ended up being the only one who did it. ROFL. But I had fun.
The thought of making another room for Marina sounded like uber fun! But, I couldn't start it until she specified rules. What if I made it too big? Or if there was a theme, or some sort of limit? I sat there for whatever seemed like FOREVER, just jotting various plans down, nothing concrete in my head, for fear I might be sad if I couldn't submit it the way I wanted.
When the rules came up finally, I was ecstatic! I had to get the secret santa projects done first, but was so happy to start my entry. Again, I regret not taking progress pictures, ESPECIALLY when an online friend I talk to on skype suggested I should. I was like "YEAH! Great idea!" And then didn't. Oy. I tried to make things efficiently, did everything I wanted and could think of in clay, then moved on to painting, etc etc.
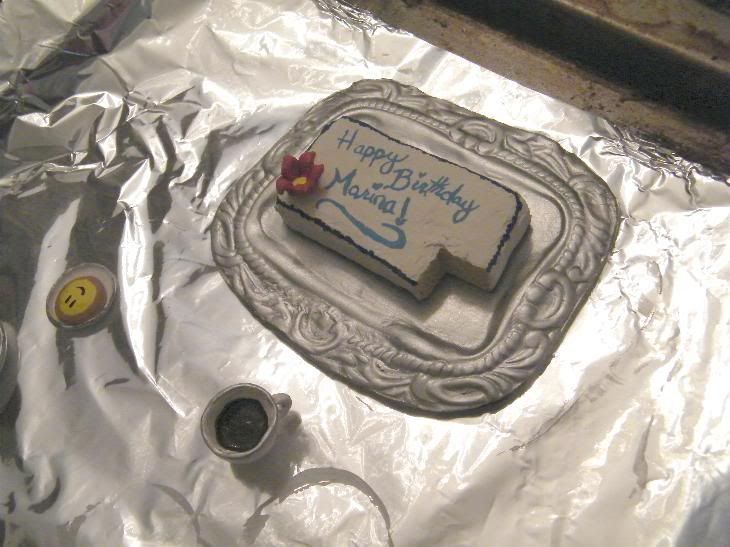
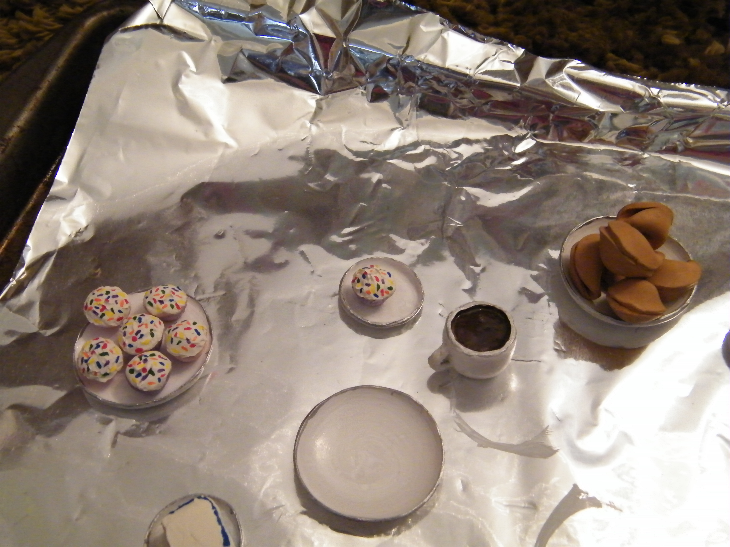
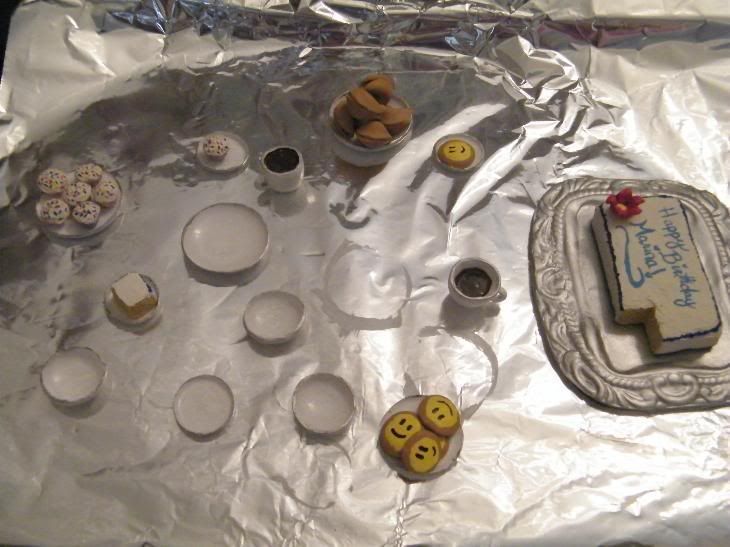
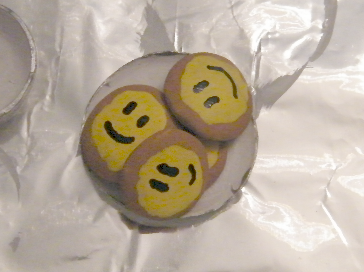 I finished the foods first. And the plates and whatnot. I made the plates by spreading a very thin circle of clay over a glass pebble. I had two sizes of glass pebbles. They're rounded on the top and rather flat on the bottom. I put circles of clay over the rounded areas of the pebbles, and the flat areas of the pebbles - to make plates and bowls, even though I didn't really need bowls. lol.
The frosting on the cake and cupcakes are made of air dry clay mixed with water, to make it spreadable. I wasn't happy with the idea of just keeping them smooth and painting on frosting. The problem with the air dry clay I have though, is that if I use too much, it cracks. Wow, if that wasn't a pain in my ass, I don't know what was. The cupcakes were small enough to be unaffected, but the cake was just big enough. I kept trying to fix the cracks by adding more clay frosting, but that would create more cracks. I tried fixing them by adding water to rewet the clay, and smooth it out, but nope, still cracked when it dried. So what to do? I couldn't cover the cracks with normal clay, because then I would have to bake it, and the air dry stuff specifically says do NOT put in oven or microwave. Finally, I covered over the cracks with a mixture of glue and water, and then painted over that to hide it. Oy.
The fortune cookies have actual fortunes in them. Printed very tiny on paper, and stuffed inside. Actually, the pics from above don't have the fortunes in them yet, but some of the pics I'll be showing will have them in. The paper sticks out just a smidgen, because I wanted them to be removable, should someone decide to see if there were actually fortunes written inside. I'm pretty sure some of the fortunes are the same as the ones I'd used in my secret santa gifts, but I can't really remember anymore. lol. Things like
"Something nice will happen in the future. Whether or not it concerns you is uncertain."
Ha. I love it when fortunes are vague and unhelpful.
The tray the cake sits on was a pain in the neck. I ended up carving a design in to a slab of clay, (using a tray I actually have as a reference) which took way longer than I thought it would, (I had a reference for Pete's sake!) then I baked that, covered it in plastic wrap, and pressed it to another slab of clay. That.... didn't work quite as planned. ROFL. But with tweaking, the result wasn't too bad.
The tea/coffee cups are not symmetrical because I fail at symmetry. I can't even remember how I did them, I just know I put tiny modified S-hooks in to them to help reinforce the.. er... little loop that you hold on a cup? ROFL. Handle? Handle. Wow, I fail. LOL.
In addition to these clay treats, I also made real cookies, which I shared in a previous post:
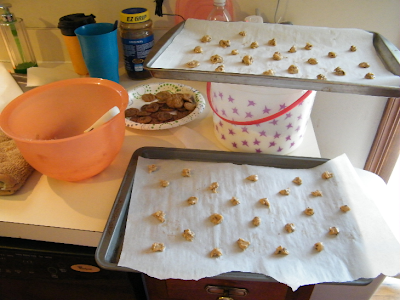
I made a TON, because I wasn't quite sure how big they should be to fit right. I only sent a dozen tiny real cookies in the end, and I think only four or five fit on the plate in the finished product. lol. They were packaged in a zippy bag, whereas the others were packaged in tissue paper. I didn't want them confused. hehe haha. Once I made the cookies to the size I wanted, I used the rest of the batter to make normal sized cookies, and sent twelve of those in zippy bags too - the idea being that the dolls and the .. er... humans.. lol... could share in the party festivities. The cookies ended up being REEEALLY crunchy, which is how I like them, but in hindsight I should have made them thinner, I fear they could cause damage to the unsuspecting. ROFL. These cookies were the last things I made, to try and keep them as fresh as possible. Which is why they aren't in those pictures up there. I made the cookies the day I packaged up my entry and the day before I sent them out.

I finished the "presents" second. First was the sewing machine. I had made one a while back, I still have it, and then around November, I made one more, and sold it. When Marina mentioned the contest around that time, I figured it would be a cute present for the birthday party, so I made another. It and the pin cushion were the only things made before January. I wrapped them together.
Second present I made was the mouse and cage. The mouse is needle felted. The cage was made by super gluing panels made of plastic plates, the edges covered in electrical tape. A lesson for those interested in making a similar aquarium cage.... and something I SHOULD have realized, (being a major NCIS fan) superglue gases cling to fingerprints. D'oh. I had to clean the panels with acetone nail polish remover to get my fingerprints off! And then I went and used too much, and the panels started getting a bit cloudy because the acetone started eating at the plastic. OY. I left them like that though, because 1) I was out of plates (cutting perfect enough rectangles out of the bottoms of plates is harder than I thought) and 2) I figured it was an "aging" effect. I know the aquariums I used for my real hamsters all those years ago started getting scratches and whatnot to make them look a little cloudy in areas. (Look at those numbered reasonings, I picked those up from the John Green books. ROFL) I used some of my dad's stick shavings for the bedding, added a woodchip acquired from the playground across the street, and made a clay strawberry and a carrot for food. Hehe.
Now the lines are blurred as to what came next. I crocheted two scarves, (waaaay too beginner to try anything else at the moment) and made another "leather book."
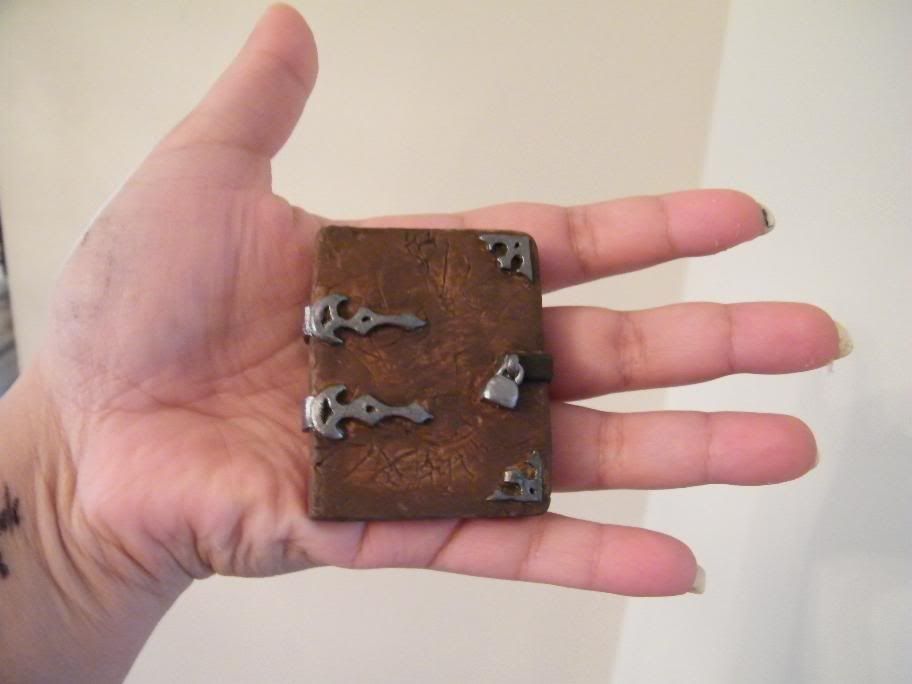
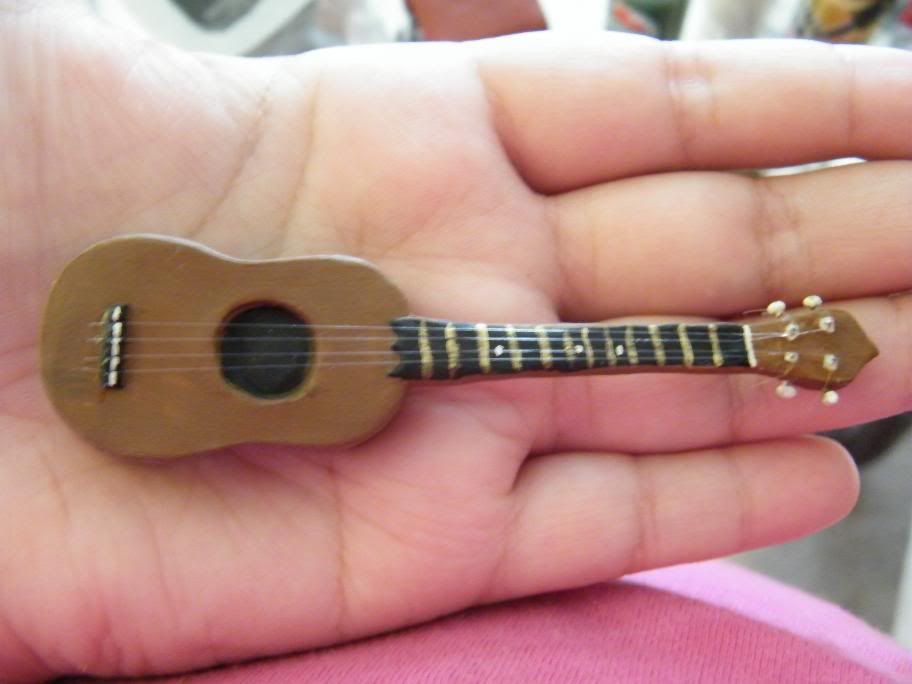
There's a wand. Why is there a wand? Er... because... I like Harry Potter? ROFL. I have no idea really. But I did think EDs would make lovely witches/wizards, and so might need a wand. I hand carved it from a wooden dowel, (stupid sharp xacto knife is... well... sharp and hurtful) much like I did for my own wand,

I made a pencil:
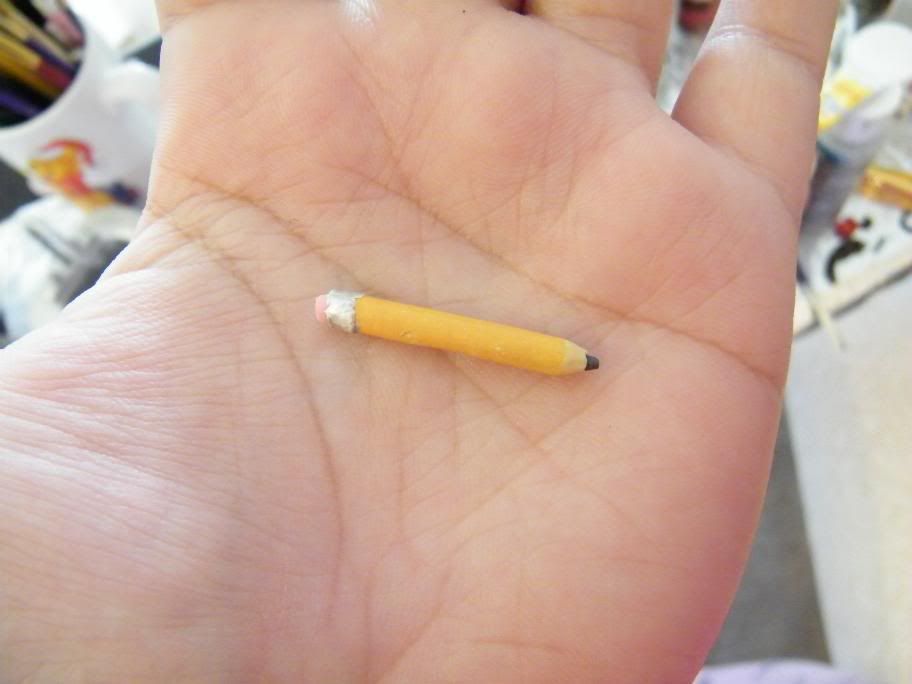
It's chubbier than I wanted, but eh. It actually has lead in it, and has an eraser. Was... a pain in the bum to make, if I try making pencils again in the future, I might need to tweak the procedure. lol.
For the secret santas, I found these cute milk pails (is that spelled right? o.O) And put bottles inside. I bought three of those pails, thinking I might be able to use it for Marina's gift too. I made a gnome to go inside hers.

For the secret santas, I found these cute milk pails (is that spelled right? o.O) And put bottles inside. I bought three of those pails, thinking I might be able to use it for Marina's gift too. I made a gnome to go inside hers.

He has a ladybug dangling from the end of his hat. hehe.
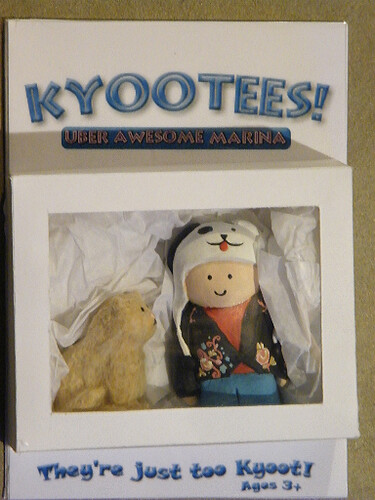
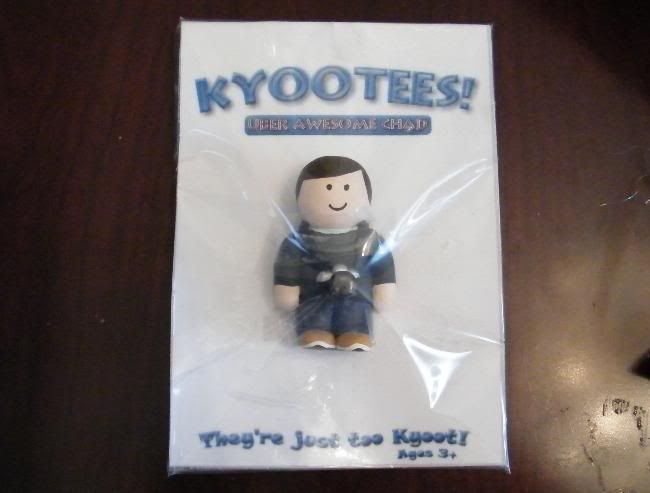
Next, and I LOVE these ones, I made mini Kyootees:
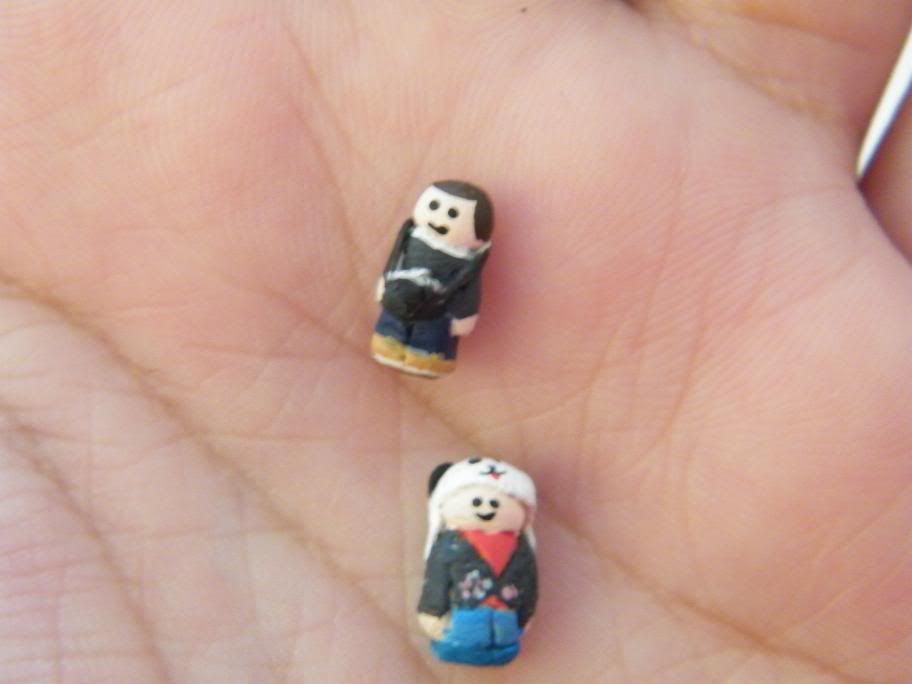
Next, and I LOVE these ones, I made mini Kyootees:

I should have stuck them on the table so I could have two hands to work on focusing... but oh well. I'm hoping they're ED scale. So Marina's EDs will have an Uber Awesome Chad and an Uber Awesome Marina for themselves. Hehehehehehee hahaha. I had too much fun with this idea, despite the fact that I hated actually making them, cuz they were just way too small. lol.
I also made a couple of comforter sets:

I also made a couple of comforter sets:

Both are reversible (er... just flip em over? lol) and made from two different types of fabric. The Red/Cream one is more of a light satinish fabric, while the sage/forest one is a heavier, rougher fabric. The idea being one for warmer weather, and one for colder.
And now we've come to the last of the presents. The one that makes the title of my project factual.

And now we've come to the last of the presents. The one that makes the title of my project factual.

The kitchen sink. Okay, so when I was rereading the rules for the seven hundreth time, I was going over the fact that I needed a title for my entry. I didn't want it to be a boring "Birthday Party" ish title, because that's no fun. And since I was throwing everything I could in to this entry, I thought of "Everything but the Kitchen Sink." And then I thought "well wait, what if I threw the kitchen sink in too? HA!!!" And so came the title of my entry. This kitchen sink was yet another one of the many things in this project that frustrated the heck out of me. I couldn't get the shape right. Too often I was working away at it, then I'd crumple it up and start over. Or I'd bake it, see it fall apart due to structure problems, and have to start again. This sink was sink number 7. And 4. LOL. I combined the spout bit from number 4 to the sink of number 7. It's not perfect, and I wish it was a smidgen better, but I was unable to improve it any further, and thinking back, I still can't think of any ideas to make improve it, so I'm happy with the result. (LOL at the writing on my arm... that's what I get for writing my shopping list on my arm with PERMANENT marker. That list took days to get OFF me. lol. I wish I could remember what was written there, it made me giggle, because I wrote one item so terribly bad, that when I bent my wrist, the letters would condense and look like another item, that was also on my list. ROFL)
The dolls next... Oh how I wish I captured pics of the other dolls. LOL. I remembered to take pics of the first one I finished:

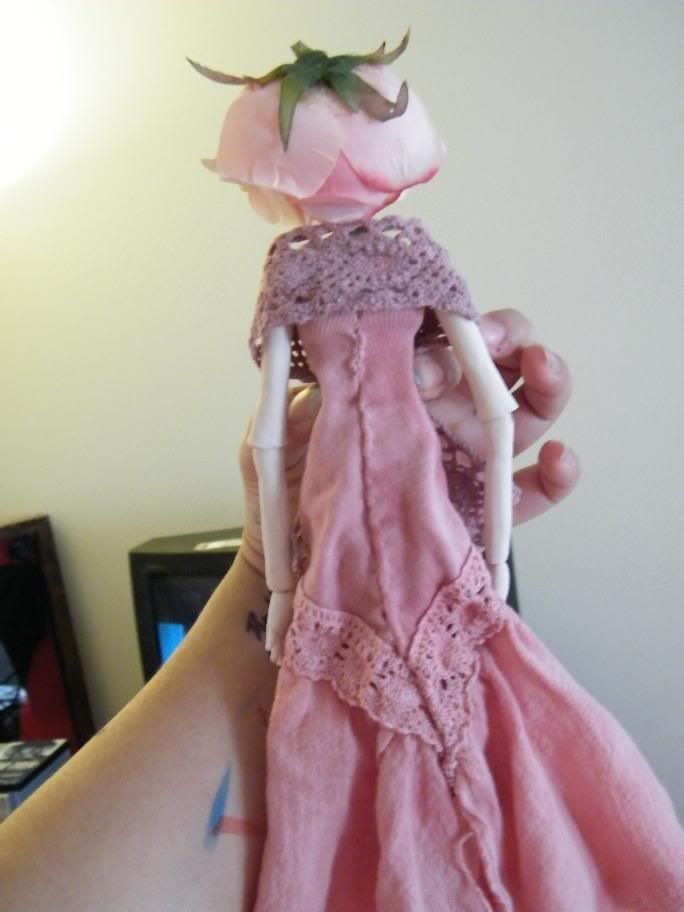
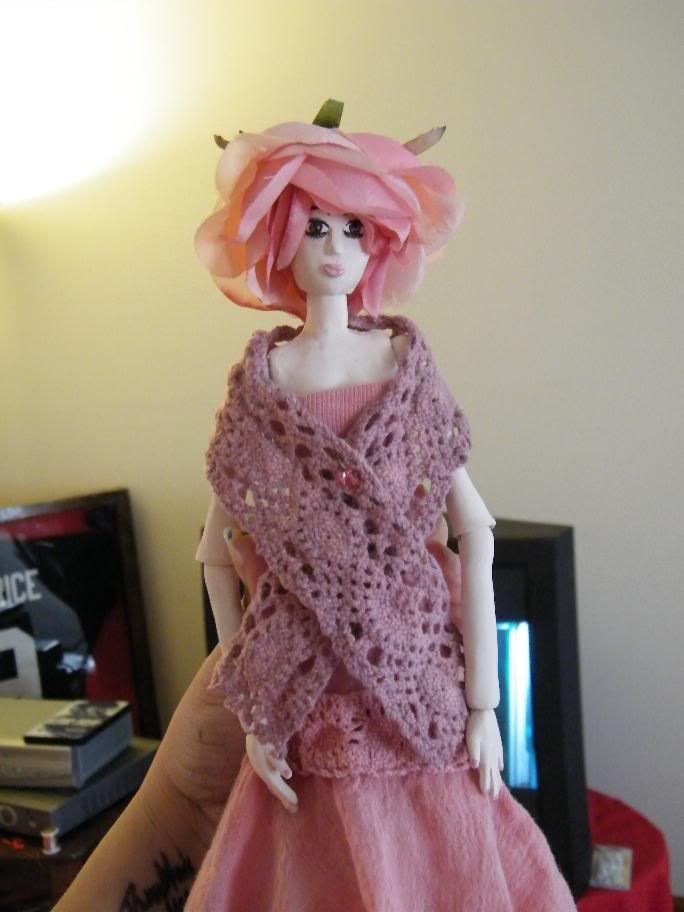
The dolls next... Oh how I wish I captured pics of the other dolls. LOL. I remembered to take pics of the first one I finished:


I made all three dolls differently. This one was made like Arietti:


Where she's hollow and strung together by elastic. Originally, she was going to have brown hair, but then for fun, I stuck a fake rose on top of her head, and liked it so much that it ended up being sticking. lol. Her outfit was the only one I actually sewed, because I needed it to be tight and new glue wouldn't work the way I wanted it to. That being said, even though it's not glued, it's still not removeable, because I sewed it straight on to her. The shrug or whatever it is comes right off though.
The other two dolls I don't have pictures of them only. :( But, one was made like my Twelve Days dolls:

The other two dolls I don't have pictures of them only. :( But, one was made like my Twelve Days dolls:

Where they have a wire internal skeleton that is visible where the joints are, so that they can be bent and moved accordingly.
The other was made more like Torn:

The other was made more like Torn:

Internal wire skeleton, but completely covered, so the pose I made her in is permanent.
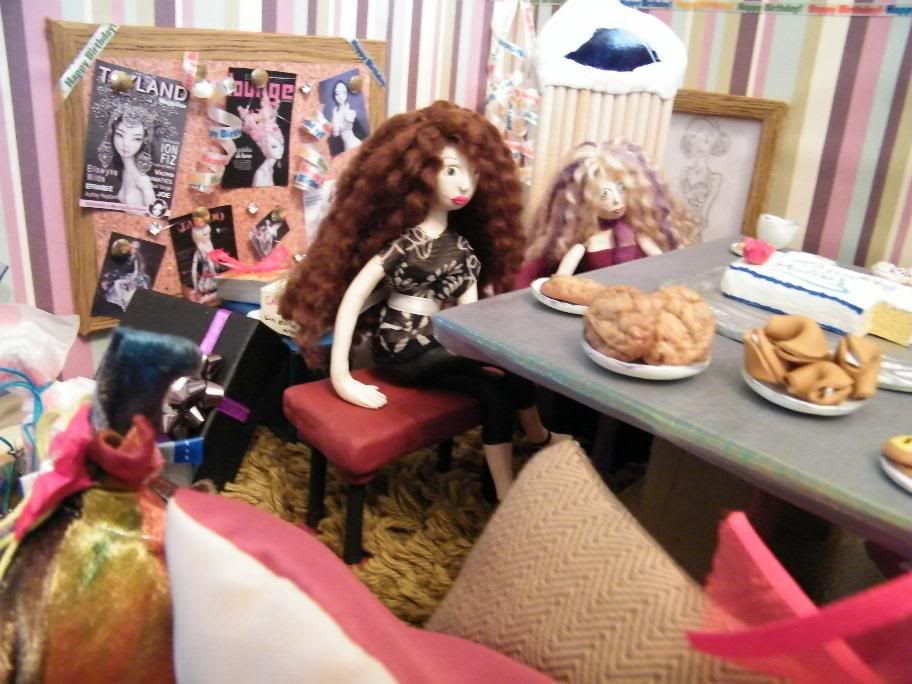

Here they are. The brunette is the "Torn" like doll, and the blonde is the "Twelve Days" like doll. I really can't believe I forgot to take pictures of them separately. Sooo many things I forgot to take pictures of specifically. The brunette is sitting on a bench, while the blonde is sitting on a chair made of tile, clay, wood dowels, and er... a box. Haha. Again, wish I took a pic of it. It's larger than her, I know, but I had hoped by dwarfing her and making the chair larger, it might work a little better should an ED want to sit there.
Ooo you can also see the real cookies and the fortunes in the fortune cookies in that pic.
You can see the bulletin board from that pic pretty well, and I don't have a better pic of it, so I'll speak of it now. My dad was kind enough to buy the last few things I needed for my room - i.e. the supplies for the actual room. (I canNOT believe I forgot the supplies for them.) And while I was standing there getting frustrated at the scrapbook paper for not having what I wanted, (eventually I found "wallpaper" that would work though, obviously) my dad pointed at some paper that looked like a bulletin board. And I was like... hmm..... that might work for something. I hadn't originally had a bulletin board in my plans, but I thought it the idea might be handy if what I did plan to put on the walls weren't enough. So I grabbed a sheet of it. So glad I did. I printed up various magazine covers, some pics of EDs, and - my favorite up on that board - the postcard that I got at the Villa Terrace when I saw her solo show. It's the Agnetha picture, third on the bottom row. It's small, because I meant for it to be the postcard. I printed out both sides of that postcard, and glued them together. So that one is two sided, hence why you might notice it's slightly curled. (I put a dab of glue on the other ones to prevent them from curling too badly)
Moving on...
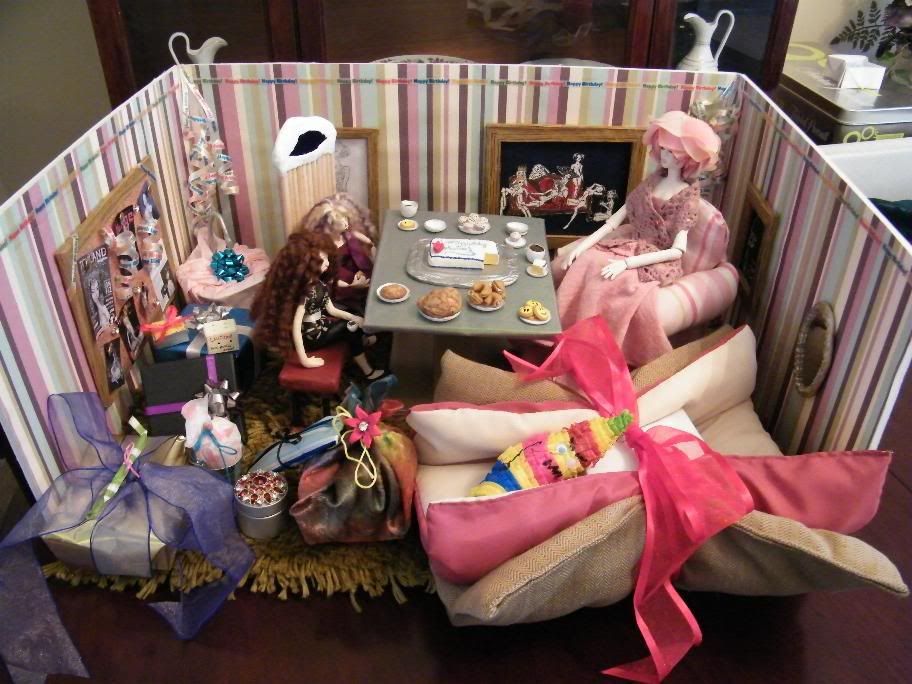

This is the whole room completed. With the presents wrapped. Some of the boxes came from mayple. THANK YOU MAYPLE! Actually, you can see the dark blue box there, with the purple ribbon and the silver bow - that's a trimmed down box from mayple. It's holding the clay book. And actually, I used one of those blue boxes as the base to that chair I spoke of previously.
So rose hair/hat/? girl is sitting on a stuffed chair, again, larger in hopes it might accommodate an ED possibly.
In the end I was real happy with the wallpaper choice. My dad helped me choose, even though he had no idea what I was planning on doing, he still gave valid points on the various scrapbook papers I'd had in the maybe pile. I grabbed five sheets of 10x10, thinking I needed one extra in case I screwed something up. Ha. HA. I ended up needing all five sheets to cover the room, and didn't have an extra. And I messed one wall up, so I wish I grabbed six sheets. lol. DX It's not a big mess up, but it did bother me. I used normal tacky glue... which wrinkled the paper. :( Hence why I needed to get a glue stick at 3am on a blizzardy snowy night. I remembered only AFTER that first wrinkled paper, that I used a glue stick to apply the paper on my walls all those years ago. Of course, I get to walmart, and THEY'RE OUT OF GLUE STICKS!!! WHY DO YOU HATE ME WALMART?!! There was nooo way I was going elsewhere to get one, it was dangerous outside! Luckily, I came across a "glue pen" that claimed "WON'T WRINKLE!" And saw it as an acceptable alternative. And as a matter of fact, it DID wrinkle. Slightly. But much much less than normal glue so eh.
The streamers are from a happy birthday bow I found while looking for tissue paper. And the carpet I'm very proud of. (Why oh why didn't I take a pic of the room while it was empty?) Again, I spent quite a lot of time in Hobby Lobby with my dad, perusing the various yarns, to see which ones matched my chosen wallpaper. I decided that of all the colors in the paper, I liked the green best, so I wanted green yarn. It was soooo hard to find the right color green. "That one is way too blue green." "Nope, that one is way too yellow green." "Don't they have any pale green yarns in this world?!" Finally, we found one, ONE, that I felt matched well enough. And I grabbed one. Of course, I was afraid one wouldn't be enough, but dang it, it was pricey, so yeah. Three whole days later, I ran out of yarn, and was less than half done with the area. I thought of painting a wood grain floor, then using the yarn carpet as just a yarn rug, but the size the carpet was at that moment was not big enough to cover the table and chairs, which at the very least, I wanted to be on the rug. So, my kindly dad handed over a few more bucks, and I wandered back to Hobby Lobby. THEY WERE OUT OF THE COLOR!!!! They had put that brand on sale, so it was only two dollars (GREAT sale) and of ALL THE FLIPPING COLORS they had available, ONLY the color I was using was gone!!! I was so sad! I went home, wondering what to do. I spend three days making that carpet/rug, and now I was leaning towards scrapping it entirely from the project, cuz it was the wrong size. I moved on with the project, with that problem still stewing in my head.
A day later I had an epiphany. There were two Michaels, a JoAnn Fabrics, and another Hobby Lobby in the area! "In the area" meaning 40-50 minutes away, but still, acceptable. I had forgotten about ALL the other craft stores! lol. Hooray! I headed over to the first Michaels, only to find they didn't sell that brand, and didn't have a color near the one I'd used. I then hit the Hobby Lobby, and there were a TON of the color/brand I needed! HOORAY! And it was still on sale, so I was able to buy two more, (for LESS than the price of the one we bought before) and be on my merry way. Hee hee haha!!! All together it took about a week straight to get this blasted carpet done.
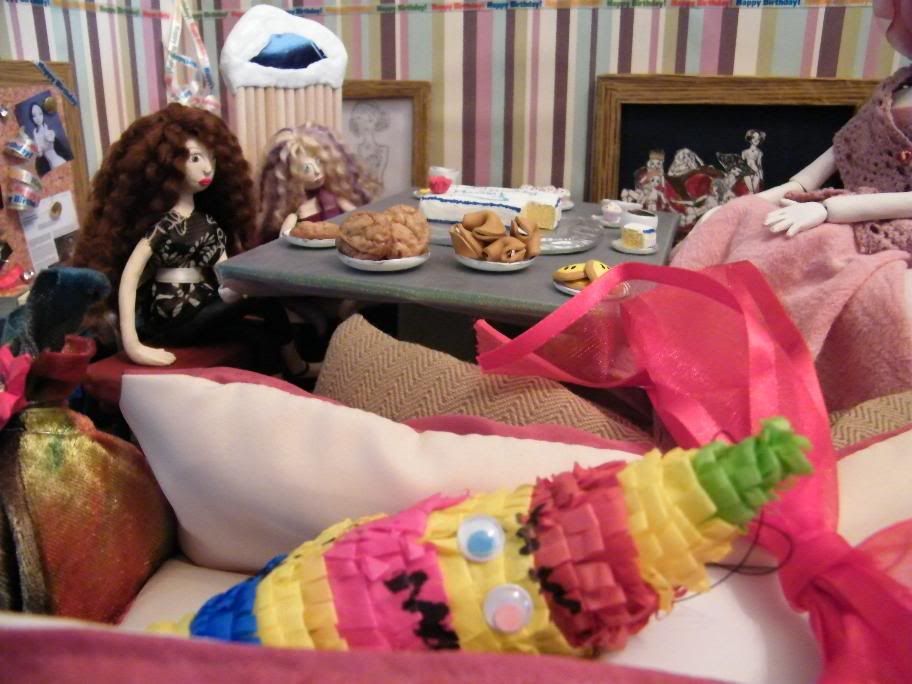

Here you can sorta see some of the "art" on the walls. The one behind the blonde is a pencil sketch of Cinderella, and next to it is a painting of the eight princesses. You can also see the pinata. It is an evil banana. Ha. I knew I wanted to make a pinata, but couldn't think of what it would be. That's when a There friend suggested an evil banana, knowing my stand on bananas. Bananas They are evil. I was forever changed one night when my dad was doing a searing for something linux and came up with this site. Okay... so not really. Or is it really? Hmmm.... you see, I thought the idea of launching a site against evil bananas was hilarious, and I began using "bananas are evil" in everything I did. I wrote There stories about them, made stickers on one website to advertise the evilness, (a sticker that, by the way, has sold to over 1500 people on that site. rofl) and just went about carrying the idea of evil bananas. So, while I suppose I do not, in fact, think bananas are evil, I did make the idea of evil bananas a big part of my life... so maybe that site did change me. Hmmm.... anyhow, I decided my friend was right, that I would share my evil bananas with Marina. :)
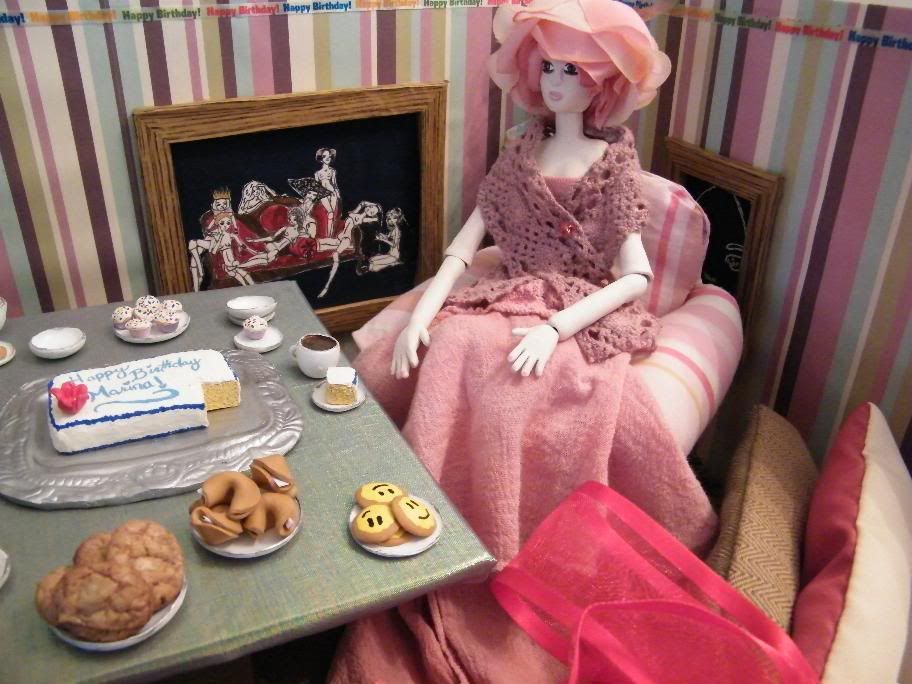

You can see the painting a bit better from here. Behind rose lady is a simple neon version of Ruby that I did online.
 Since I did it on the puter, I can show you the picture here.
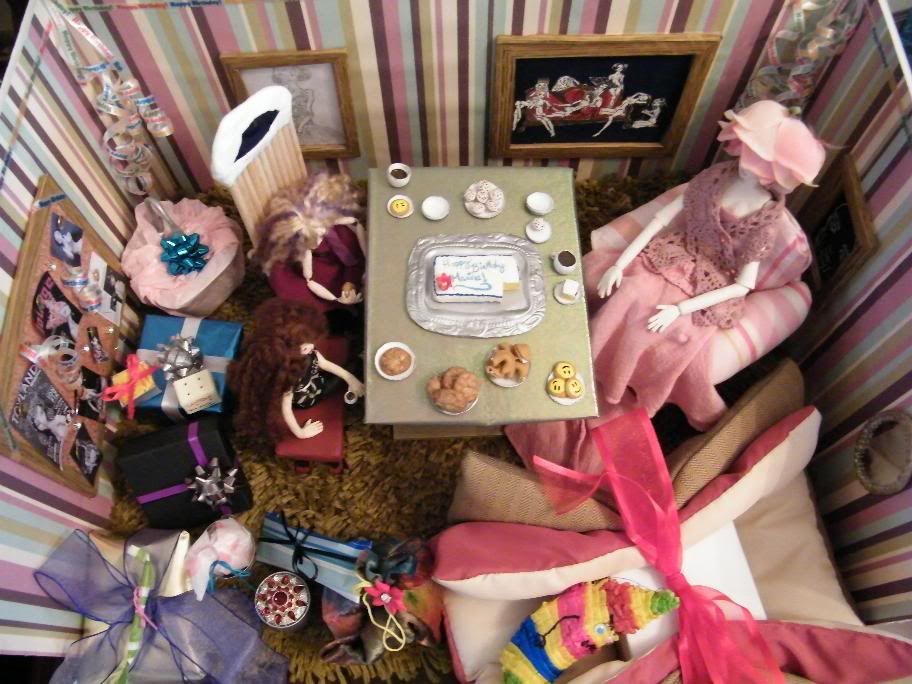
 Since I did it on the puter, I can show you the picture here.
All the way on the right, you can barely see (if you click on the image, it might show the original size?) the mirror. I found these mirrors at Hobby Lobby a while back, and wanted to make something with one. I ended up just making a pretty frame out of clay and painting it a bronzey color.
Lemme talk about the table, since I haven't talked about that yet. And actually, it leads to a bit of the room too. The room itself, as well as the top and bottom of the table, are made of foam core board. Actually, the bulletin board is made of it too. But yeah, back to the table, I glued two pieces of wood to the foam core boards, then spray painted the whole thing with a bronzey color paint. (lol... I like bronze?) Then, while I think I was looking for something else, I miraculously found my spray glue, (If I found it just days before, I wouldn't have needed the blasted glue stick!) so I used that to glue the iridescent fabric to the top of the table. (iridescent fabric from the lovely mayple) My dad saw my table and asked if it was level. I laughed at him. Do I have a level?? I stared at it, and it looked level, but that was as technical as I got. He then said that he would have happily made sure the wood I used was level, had only I asked him. Oops. I forget sometimes that my dad actually doesn't mind helping when asked. I just assumed he was real busy with a stick he was making at the time. (I showed it in the previous post, it's the one[s] just before my dad's Bigger Badder Meaner stick) Oh well though. It looked level enough and the stuff on the table didn't slide off, so I count it as successful. lol.
A side note, I also used foam core board as frames for the pics on the wall. I glued the pictures to posterboard, then carved out basic frame shapes from the foam core board, then covered the frames with wood grain contact paper. Glued the frames to the posterboard. The bulletin board was done slightly different. Since I needed the board to have thickness so I could punch thumbtacks in, I glued the paper to the foam core board, then covered the edges with the contact paper, to make it look framed.
A side note, I also used foam core board as frames for the pics on the wall. I glued the pictures to posterboard, then carved out basic frame shapes from the foam core board, then covered the frames with wood grain contact paper. Glued the frames to the posterboard. The bulletin board was done slightly different. Since I needed the board to have thickness so I could punch thumbtacks in, I glued the paper to the foam core board, then covered the edges with the contact paper, to make it look framed.

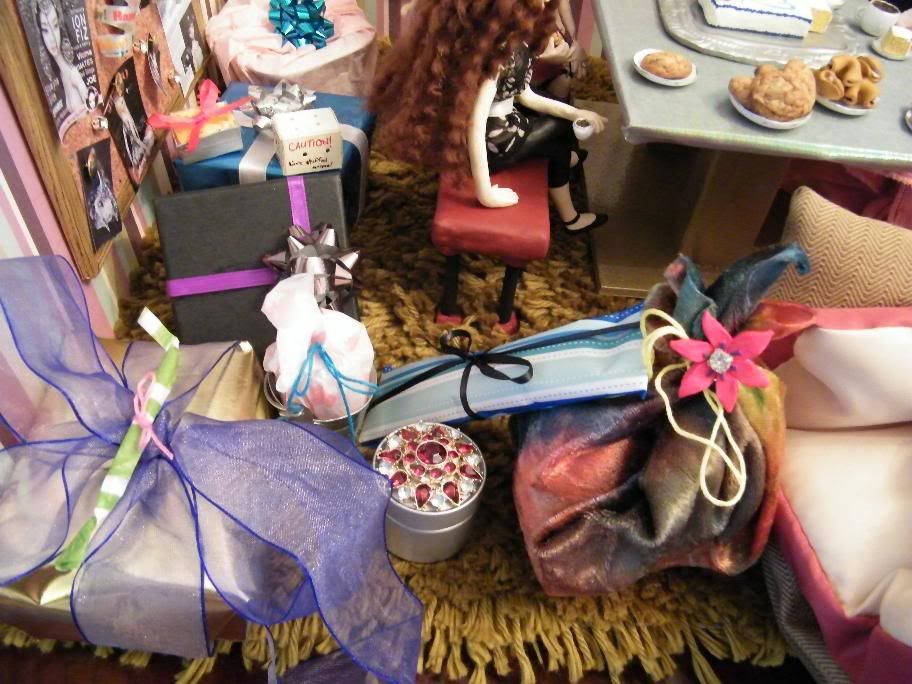
So here we have a picture of the wrapped presents. Starting at the top, wrapped in pink tissue paper with a blue bow, is the sink. Below it, in a white box from mayple, but wrapped in blue wrapping paper with white ribbon is the aquarium. On top of that, in the "CAUTION: Live stuffed animal" box, is... well, the mouse. lol. Next to that, still on top, in the yellow with a red bow, is the mini Kyootees and the pencil. In front of the aquarium, in the blue box (as I've already mentioned) is the book. To the left and in front, in the gold wrapping with the blue ribbon, is the sewing machine/pin cushion. On top of that, in the tissue paper is the wand. Next to the sewing machine, is a bucket that has the gnome wrapped in tissue paper. Next to that is a longer present in blue striped wrapping - the ukulele. In front of that is a tin that I saved from years ago. It had mints in it. I don't think I even ate the mints, I bought it because I liked the tin. LOL. Inside that is the two scarves. They were stuffed in, and the tin sorta locks shut... so I think it's like, spring loaded. ROFL. Next to that in the tye dye fabric, (from mayple. THANKY!) with the little clay flower on it is the stuffed turtle. And next to that (gets cut off) are the comforter sets and the pinata. Heee
The project in it's entirety, took over a month to complete. Factor in the bits that I'm currently unemployed and have insomnia issues, and this translates to hundreds of hours. I'm very happy with the result, and can't see anything I would have done differently. So even though I didn't win, I'm still glad I participated, because in the end, it's still a present I'm proud to have sent to my inspiration, my favorite artist, my obsession, Marina. :)
OKAY! SO! I think I covered everything. Hee hee haha. Ha ha ho... Wow... that took a LOOONG time. *checks* ah, nah, only 5 hours. lol. Guess I'm done for tonight. :D
